
Содержание
А это, по видимому, самое интригующее. Так уж случилось, что авторы очень любят использоватьмногопоточность (кол-во потоков выставляется вручную) , антикаптчу (antigate.com) и работу через списки прокси/socks (simpleproxy.ru). И не смотря на free распространение данной программы, это реализовано и здесь. Далее – основа. Надеемся, что скорость её работы Вас приятно удивит.
Базовый режим – восстановление паролей по списку Ваших почтовых аккаунтов. Программа делает запрос на восстановление пароля, затем осуществляет проверку на почтовом сервере (к слову сказать, поддерживаются все популярные почтовые службы рунета) и забирает пароль от аккаунта Вконтакте. Разумеется, пришедшее письмо затем удаляется.
В случае, если Вам понадобится провести проверку почтовых аккаунтов, то можно просто переключить программу на 2-ой режим “Проверка e-mail”. Там Вас будет ждать – сортировка почтовых адресов, удаление дубликатов, различного мусора и, конечно, проверка на валидность.
В добрых традициях, весь процесс сопровождается статусами в обоих режимах. Например, для проверки аккаунтов – “В работе”, “Восстановлено”, “Не восстановлено”.
Несмотря на то, что тренд по использованию Hero Image уже не так свеж, он все еще актуален. Использование подобных изображений помогает сделать ваш продукт или страницу сайта привлекательнее и мотивирует пользователя посмотреть, что же вы ему предлагаете. Сегодня мы приглашаем читателей ознакомиться с переводом статьи Ника Бабича о том, как достичь максимального эффекта, применяя данный прием.
Из статьи вы узнаете:
- почему визуальная составляющая играет решающую роль в привлечении пользователей;
- какие функции выполняют изображения на сайтах;
- что следует учитывать при отборе картинок.
Любая веб-страница оставляет положительные или негативные впечатления у пользователя при посещении. Эта реакция в значительной степени определяется тем, что именно человек видит перед собой. Поскольку глаза являются самым сильным органом чувств, при помощи смелого, яркого изображения можно наиболее быстро привлечь посетителей. Оно мгновенно захватывает внимание и служит главным информационным блоком для минималистичных веб-сайтов и приложений.
— это не просто красивая картинка. Это мощный инструмент коммуникации.
В этой статье я дам вам несколько советов, как правильно использовать технику Hero Image.
Выбирайте удачные изображения
Будьте придирчивы при выборе фотографий
Визуальная составляющая в интерфейсе решает всё. Важно уметь выбирать снимки, которые соответствуют тематике, целям и стратегии проекта. Неправильно подобрав изображения, вы тут же растеряете всех посетителей вашего сайта.

Пример неудачно выбранной картинки
Если же вам удастся найти именно то, что нужно, пользователь захочет посмотреть, что еще вы можете ему предложить.
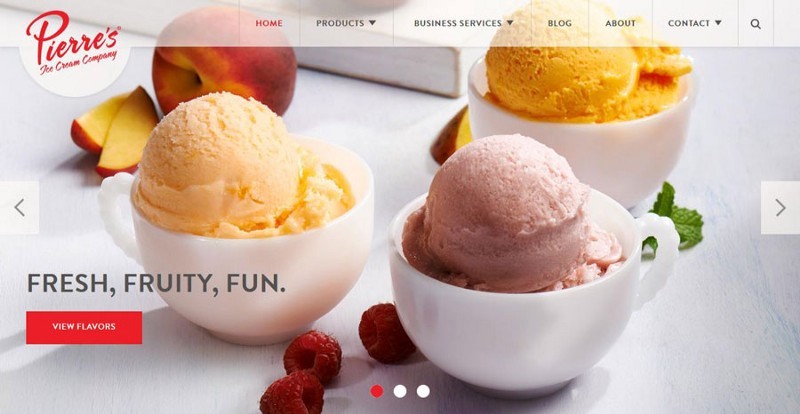
Пример правильно подобранного изображения
Сделайте картинку композиционным центром
Hero Images идеально подходят, чтобы сжато передать самую важную информацию
Стремитесь выделяться и отличаться. Графический блок должен мотивировать пользователя при каждом посещении задержаться на сайте и еще раз просмотреть его.
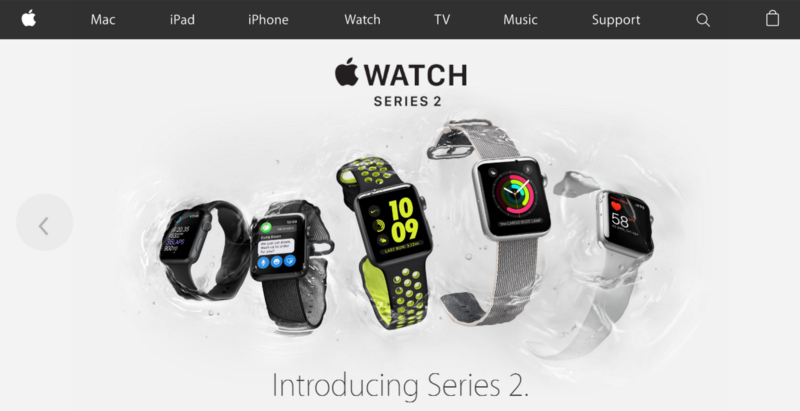
Apple — профессионал в создании Hero Image.
Совет: это вовсе не означает, что картинка должна передавать всю информацию целиком. С помощью Hero Image можно, скорее, уместным образом визуально подчеркнуть ключевые моменты.
Ищите изображения, вызывающие эмоции
Внедряйте эмоции в дизайн
Ваши изображения должны вдохновлять, оказывать психологическое воздействие, усиливать те чувства, которые вы пытаетесь взывать у аудитории. В конце концов, эмоции часто перекрывают здравый смысл, когда нужно принять важное решение.

Положительные эмоции могут привести к ощущению взаимодействия с пользователем.
Используйте качественные снимки
Изображения не должны быть размытыми и нечеткими
Нет ничего хуже больших фотографий низкого качества. Картинка — ваше все, если вы собираетесь использовать технику Hero Image. Очень важно добиться того, чтобы первое впечатление у пользователя было положительным. Для этого используйте только высококачественные изображения.

Размытая картинка и снимок подходящего размера
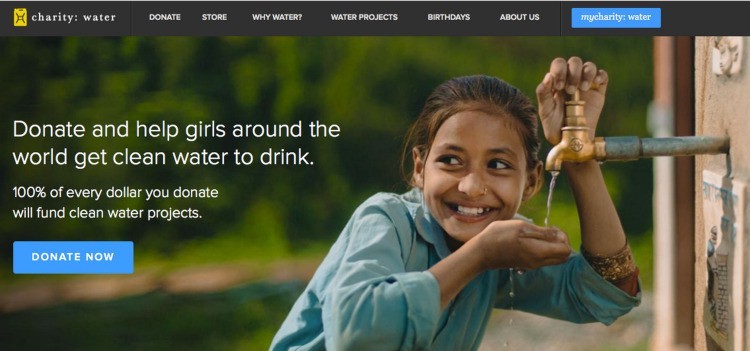
Акцентируйте внимание на кнопках призыва к действию
Призыв к действию не должен конкурировать с красочным изображением
Несмотря на то что все внимание здесь сосредоточено на картинке, нельзя забывать и о других ключевых элементах интерфейса — например, «призывах к действию» (англ. call to action, CTA). При попытке акцентировать внимание пользователя очень важен правильный выбор цвета. Кнопки с призывом к действию должны мгновенно бросаться в глаза.
Кнопки должны гармонировать с большими изображениями
Выдерживайте контраст в дизайне
Убедитесь, что текст, который вы располагаете поверх фото, легко читается
Выбирайте жирный, читабельный шрифт, который будет сочетаться с изображением, но в то же время выделяться на его фоне. Разместив текст поверх картинки, убедитесь, что основная часть снимка остается видной и понятной. Наверное, самый простой способ расположить текст на фото — это overlay. Если исходный фон недостаточно темный, вы можете наложить сверху черный полупрозрачный слой.

В качестве альтернативы вы можете применить scrim:
Scrim — это особая техника визуального дизайна, смягчающая изображение, чтобы наложенный текст был более читаемым.
О применении других эффектов вы можете узнать в статье "Хитрости дизайна: Текст на фото"
Учитывайте разные размеры экранов
Картинка должна выглядеть пропорционально на всех устройствах
Убедитесь, что изображение сохраняет нужные измерения на дисплеях любого размера.
Оптимизируйте визуальные элементы для всех платформ и девайсов, даже если для этого потребуется изменить размеры или заменить крупное фото более мелким для маленьких устройств.

Автор фото: themeforest
Совет: используйте инструменты, с помощью которых вы сможете управлять сразу несколькими размерами. Одним из них является Cloudinary, который позволяет вам задавать набор контрольных точек для изображений.
Используйте иллюстрации
Из-за стремления к оригинальности дизайнеры все чаще делают выбор в пользу иллюстраций, а не фотографий. Рисунок от руки дает вам больший контроль как над содержанием изображения, так и над его техническими деталями.
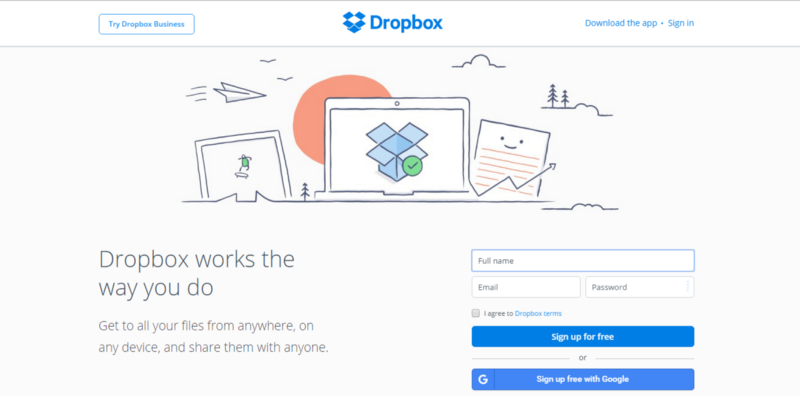
Dropbox показывает процесс обмена сообщениями и объясняет сложные идеи посредством легко понятных рисунков
Совет: если вы решили использовать иллюстрации для своего интерфейса, убедитесь, что они сочетаются между собой: как если бы они были взяты из одного источника и нарисованы одним человеком.
Заключение
Если вы умеете выбирать интересные и при этом высококачественные изображения, которые хорошо работают в связке с контентом, данный тип дизайна — отличный вариант для вас. Чтобы использовать ее возможности по максимуму, не забывайте о контрастах и четких призывах к действию.
After signing up for Imaging services, Retriever for Imaging allows you to upload, manage and archive documents from any location on any computer into your paperless office provided by Redtail.
To download and install Retriever for Imaging, log in to your Imaging account using your Redtail Username and Password here or by clicking on the Single Sign On for Imaging available from the Integrations menu within your CRM.
Once logged in, the Download Retriever link will be available from the Tools menu in your Imaging navigation bar:

Login / Password Settings
After you have downloaded and installed Retriever for Imaging, locate its icon on your Desktop or from your Start Menu and click to open the application:

The first thing you will see is the Login dialog below:

You will use your Redtail Username and Password to login to Retriever for Imaging. Note the two checkboxes below the Password field. If you select “Save Password,” these fields should already be populated in the future whenever you attempt to open Retriever. Selecting the “Auto Login” box would allow you to bypass the Login screen altogether when opening Retriever in the future. You can always change these settings later, either upon Login or from within Retriever under the File —> Login menu. Also note that if you save your Password, you will need to update this whenever your password for your CRM changes, as Retriever uses the same password.
Learning Your Way Around Retriever for Imaging
Upon login, your Retriever application will resemble the example below:

Bear in mind that this is an example – while all the Menus, Libraries and buttons we discuss will be available within your Retriever, the folders, sub-folders and images used in these examples are for illustrative purposes only.
Menu Options
There are three Menus available within Retriever: File, Libraries and Help:

We’ll consider each of these in turn.
File Menu
Your File Menu offers three options: Login, Preferences and Exit:

Login: Selecting Login simply opens up your Login screen, allowing you to change your “Save Password” and “Auto Login” options or to Sign Off, which you can also do under File —> Exit.
Preferences: Selecting Preferences opens up a separate dialog, allowing you to set some defaults for your Retriever:

If you check off Start with Windows, Retriever for Imaging will automatically start whenever you start your computer.
Selecting Start minimized in System Tray will open the application when Windows is started, but it will be minimized and available from your System Tray.
Typically, you would not want to select Include Hidden files in Upload, as those would generally be system files you would have no need of in your Imaging libraries.
The final option in the top section, Overwrite existing files when saving folder to computer, applies only when utilizing the Save option under the Libraries menu, which we’ll discuss below. In a nutshell, if you check off this option, when saving a folder from Retriever to your local computer, if saving to the same location that contains another folder of the same name, the folder you are saving will overwrite the existing version on your machine.
At the bottom of your Preferences dialog, you have the options to view your History Log for Imaging activity in Excel or Retriever and an option to view an ErrorLog for Retriever for Imaging.
Be sure to click Apply after making any changes you want to preserve in your Preferences.
Libraries Menu
Your Libraries Menu offers four options: Save Client, Save Corporate, Save Unfiled and User Libraries:

Help Menu
Your Help Menu offers two options: Document and About Retriever for Imaging:

Choosing “Document” will open up a Help file for Retriever. Choosing “About Retriever for Imaging” will allow you to see the version of Retriever you’re using, something you might want to know if you’re not certain you’re using the most current version.
Browsing Options
There are three default Libraries available for document storage within Redtail Imaging (Client, Corporate and Unfiled) along with as many User Libraries as you might need:

We recommend that you use the Client Library for client related documents, the Corporate Library for business related documents and the Unfiled Library for files awaiting a decision as to placement. Of course you may strictly use only User Libraries or a combination of the User Libraries and the Default Libraries as well. To examine the contents of or upload to any of your Libraries, simply click on its corresponding button as seen above (you can access any of your User Libraries by clicking that button and then clicking the desired User Library). Directly beneath your Library buttons is a box which displays the path of the current folder you are inside. In the example below, we are inside the top level Folder for Stephen Avery in the Client Library:

Note as well the  button after the Current Folder box. Clicking this will refresh the view of your current folder. Clicking
  will take you one level up from your current folder, so in this case would take you up to the top level of the Clients Library.
Working with Files and Folders
As you can see below, for whatever folder you happen to be in, you can view the Folder and Image names within that folder, the date and time they were added, their file extension (Images only) and their size (Images only). By clicking on any of these column header names, you can also sort the files and folders according to one of these criteria:

Also, using the Create New Folder button, you can create a New Folder for storing documents at this level:

After clicking the button, you will be given an opportunity to name your New Folder.
Some Mouse and Keyboard Tips
• Double clicking a folder takes you inside that folder. Double clicking a file downloads the file and opens it. When you have a file or folder selected, pressing the “Enter” key on your keyboard works the same as a double click.
• “Drag and Drop” is a very useful feature. You can drag any folders or files from your computer and drop them in the top pane of Retriever for Imaging. This action will list everything in the “Upload Queue” and everything will begin uploading immediately at whatever folder level you drug the files/folders to.
• “Dropping” a folder preserves the structure and puts files in the same structure they were originally.
Right Click Options for Folders
When you right click on a Folder Name, you’ll see the options below:

• “Create Folder” creates a new folder at the same level as the folder you have right clicked on. You will be provided with a dialog box where you can enter the name of the new folder.
• “Open Folder” takes you inside the selected folder.
• “Save Folder” allows you to save a Folder (along with its contents) to your computer. Clicking on the Save option will present you with a Browse for Folder dialog. Select where on your computer you want to save the Folder and click OK. The Folder will then be downloaded to your computer in the location you indicated.
• “Rename Folder” will bring up a dialog where you can enter the new name for the Folder.
• “Delete Folder” will delete that folder and all contents inside that folder. It will ask for your confirmation, because you cannot undo this.
• “Cut Folder” will enable “Paste” functionality, so you can browse to a different location and paste that Folder and its contents.
Right Click Options for Files
When you right click on a File Name, you’ll see the options below:

• “Create Folder” creates a new folder at the same level as the file you have right clicked on. You will be provided with a dialog where you can enter the name of the new folder.
• “Open Image” downloads the file and opens it.
• “Save Image” will show you the file save box so you can select where to save the file on your computer.
• “Rename Image” will bring up a dialog box where you can enter the new name of the file.
• “Delete Image” will delete that file. It will ask for your confirmation as you cannot undo this.
• “Cut Image” will enable “Paste” functionality, so you can browse to a different location and paste that file.
Right Click Options for Multiple Files and Folders
When you right click with more than one File and/or Folder selected, you’ll see the options below:

• “Create folder” creates a new folder at the same level as the items you have right clicked on. You will be provided with a dialog where you can enter the name of the new folder.
• “Open” will open all of the selected files where you can view the contents of the files in separate windows.
• Save and Rename functions are disabled.
• “Delete” will delete all selected items.
• “Cut” and “Paste” are not functional when multiple Folders/Files are selected.
Uploading Basics
Your Upload Queue shows up in the bottom half of your Retriever window. As we mentioned above in the Mouse and Keyboard Tips section of Working with Files and Folders, you can drag any folder or files from your system and drop them in the Files and Folders section of the Retriever window. This action will list everything in the “Upload Queue” and everything will begin uploading immediately:

The Upload Queue has four columns:
1. File Name is simply the name of the file being uploaded.
2. Upload Folder is the destination folder on Imaging to which your file is being uploaded.
3. File Path is the location of the file on your computer.
4. File Size indicates how much storage space the file requires. Note: the maximum upload size for a file using Retriever for Imaging is around 20 MB.
Note as well the two buttons above the queued files:  is the Upload Queue Statistics button. If you were to click it in the example given above, you would see the information below:

In this example we attempted to upload six files (Total Files). Three were successfully Uploaded, represented in the queue itself by the  icon. Zero files are Remaining to be uploaded, and three files Failed to upload, which is represented in the queue by the
  icon. If there were files still being uploaded or waiting in the queue to be uploaded, you would see the
  icon next to them. The Clear Queue button (
 ) stops the Upload process and clears your Upload Queue.
Right Click Options for the Upload Queue
When you right click on an item in your Upload Queue, you’ll see the options below:

• Retry Selected will attempt to upload any selected items again.
• Remove Selected will remove selected items from the Upload Queue.
• Retry Failed will try to upload all failed items.
• Remove Failed will remove all failed items from the Upload Queue.
• Remove Completed will remove all completed items from the Upload Queue.
• Remove All will remove all items from the Upload Queue, functioning the same as the Clear Queue button.
• Select All selects all items in the queue.