
Содержание
Since this was written at the launch of Windows 10, Start menu has continued to evolve and customization and management has evolved as well. There are special cases around multiple links to the same .exe, differences in browser behaviors and rules around other types of links. (meaning this blog post might not always work depending on several variables) The best resources for customizing Start is found here:
The content team has been awesome at keeping this up to date with every feature upgrade and changes we make are usually added the same day.
(Original post 10/6/2015)
Here’s a quickie!
Do you have specific files you use often? Websites? Or prefer the website to the App? Or maybe have an internal website that you can never remember the URL? Do you want to pin this to the Start Menu in Windows 10?
First — there is a quick solution when using the new Edge browser. Visit the site, click on the "…" and select Pin to Start. It’s that easy.
But for files or website that you want to open in IE, we need a shortcut. First, I’ll step through how to do this from scratch. Later show how you can do this with existing items.
Step 1
Right click on the desktop and select New -> Shortcut

Type in the URL for your site:

And a friendly name:

Now you should see the generic Shortcut on the desktop. (you can customize the Icon for the shortcut if you’d like here but not required)
Step 2
Go to Run (right click on Start and select Run)
Type in %appdata%MicrosoftWindowsStart Menu
And hit enter. A Windows explorer folder should open to that location.
You can drag the newly create shortcuts to the folder. Or you can create a subfolder under Programs
Copying the links to the root Start Menu folder will mean that items show up on the All Apps list, If its in a subfolder under Programs you will find the shortcuts in that subfolder on All Apps. Depends on how OCD you want to be with shortcuts.
Step 3
Now open the Start Menu and scroll down the All Apps view. You should see your shortcuts listed here.

From here you can right click and select "Pin to Start"
Once on the Start you can resize between Small and Large.
If you have existing IE favorites that you want on Start you can just copy the link file from Favorites folder ( %userprofile%Favorites ) to %appdata%MicrosoftWindowsStart Menu
Here’s a mix of links I’ve added, two from Edge and the rest from shortcut links.

More information:
Start layout for Windows 10 desktop editions
Customize the Windows 10 Start screen
Customize Windows 10 Start with Group Policy


If you can’t pin apps to Start Menu, that can be an annoying problem for some users. Speaking of pinning apps, these are some of the most common problems that users reported:
- Can’t pin to Start Menu windows 7 – This problem can occur on all versions of Windows, and even if you’re not using Windows 10, you should be able to apply most of our solutions to your version of Windows.
- Pin to Start Menu not working Windows 10 – Many users reported that this feature isn’t working for them. If that’s the case, try disabling or removing your antivirus and check if that solves the problem.
- Pin apps Start Menu disappeared, doesn’t work, doesn’t appear, not working – Several users reported that this feature doesn’t appear on their PC at all. If you’re having this problem, you might be able to fix the issue by changing your group policy.
Here’s how users describe the problem:
just installed Win10. And already facing very small and annoying problem which i wonder how MS could overlook.
If I try to “pin to start” any shortcut or application/.exe just nothing will happen, start menu is not reacting on this action. Same with “unpin from start”.
Before performing any troubleshooting actions, first make sure:
Solution 1 – Check your antivirus
According to users, if you can’t pin tiles to Start Menu, the problem might be your antivirus. Your antivirus can sometimes interfere with Windows 10 and that can cause certain features to stop working.
However, you easily fix that simply by checking your antivirus settings.
Sometimes certain settings can interfere with Windows, and in order to fix the problem, you need to find and disable this setting. If you can’t find the setting that is responsible for this error, you might have to disable your antivirus entirely in order to fix the problem.
In some cases, you might even have to uninstall your antivirus. Users reported problems with Kaspersky Antivirus, however, they managed to fix the issue simply by removing it.
For the Norton users, we’ve got a dedicated guide on how to completely remove it from your PC. There’s a similar guide for McAffe users, as well.
If you’re using any antivirus solution and you want to completely remove it from your PC, be sure to check out this amazing list with the best uninstaller software you can use right now.
If you decide to remove your antivirus, you might have to consider switching to a different antivirus solution.
There are many great antivirus tools on the market, but the best are Bitdefender, BullGuard and Panda Antivirus, so feel free to try any of them.
Solution 2 – Use Group Policy Editor
Sometimes you won’t be able to pin tiles to Start Menu due to your policies. However, you can always change your policies by doing the following:
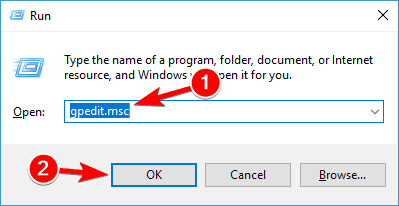
- Press Windows Key + R and enter gpedit.msc. Now press Enter or click OK.
- In the left pane, choose User Configuration > Administrative Templates > Start Menu and Taskbar. In the right pane, double click on Prevent users from customizing their Start Screen.
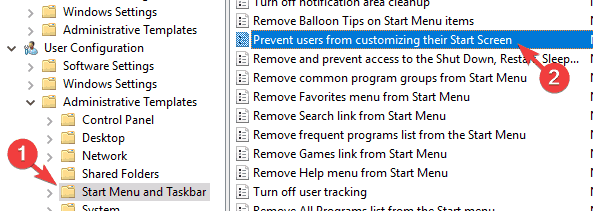
- Select Not Configured and click on Apply and OK to save changes.

After changing these settings, your problem should be resolved.
Learn how to edit the Group Policy like an expert with the help of this useful guide.
Solution 3 – Run Windows PowerShell
If you can’t pin tiles to Start Menu, you might be able to fix the problem by re-registering Start Menu. To do that, follow these steps:
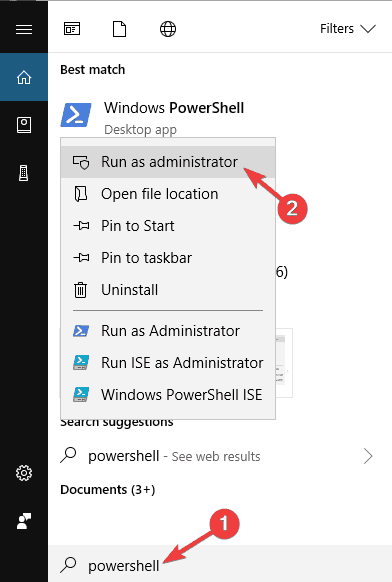
- Press Windows Key + S and enter powershell. Right click PowerShell from the list of results and choose Run as administrator.
- Paste this command in the Windows PowerShell window: Get-AppXPackage -AllUsers | Foreach

- Wait for PowerShell to execute and complete the command. Ignore the errors that may appear.
- Restart your computer.
Solution 4 – Run the System File Checker
If you can’t pin apps to Start Menu in Windows 10, the issue might be file corruption. There are various reasons for file corruption, but in order to fix the problem, it’s recommended to repair your files using the SFC scan.
This is rather simple and you can do it by following these steps:
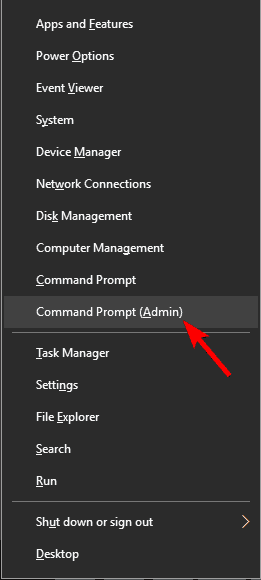
- Press Windows Key + X and choose Command Prompt (Admin) from the menu. You can also use PowerShell (Admin).
- Type sfc /scannow > hit Enter. Wait for the scan to finish.
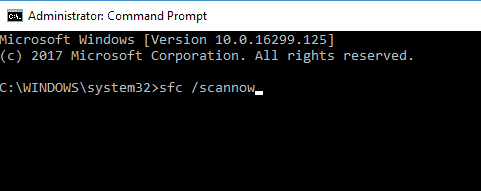
- Try to pin apps to the Start page. If you still can’t pin tiles, move to the next step.
If you’re having trouble accessing Command Prompt as an admin, then you better take a closer look on this guide.
Solution 5 – Simply drag and drop the apps to the Start Page
Drag and drop the application from all apps menu to start menu
That works for me, just right-clicking and choosing “Pin to Start” doesn’t work
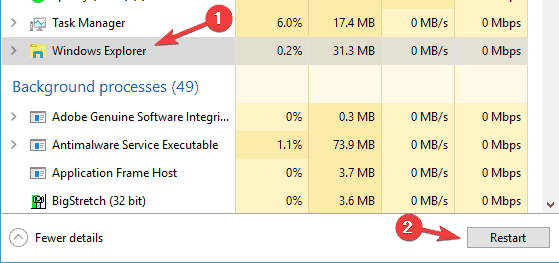
Solution 6 – Restart Explorer within the Task Manager
Sometimes this issue can be caused by a temporary glitch. However, users found a quick and easy way to fix this problem. According to them, you just have to restart the Explorer process and the issue should be resolved. To do that, just follow these steps:
- Press Ctrl + Shift + Esc to start Task Manager.
- Type Task Manager > stay on the Processes tab.
- Go to Windows Explorer (at the end of the list). Click the Restart button (bottom right of the task manager window).
Solution 7 – Use Regedit to change the Start page layout
- Press the Windows key + R to open Run > Type regedit.

- Open HKEY_LOCAL_MACHINESoftwarePoliciesMicrosoftWindowsExplorer (for some users Explorer may not be listed)
- Change LockedStartLayout from 1 to 0.
- Restart your computer.
If you can’t edit your registry, follow the steps in this dedicated guide an learn how you can do it like a pro.
Solution 8 – Create a new user account
If you can’t pin tiles to Start Menu, the issue might be your user account. Sometimes your account can get corrupted, and in order to fix it, you need to create a new account by doing the following:
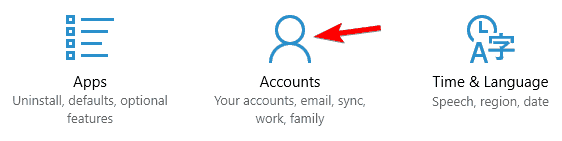
- Press Windows Key + I to open the Settings app.
- Now go to the Accounts section.
- From the menu on the left choose Family & other people. In the right pane select Add someone else to this PC.

- Select I don’t have this person’s sign-in information.
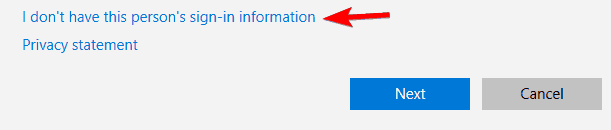
- Now choose Add a user without a Microsoft account.
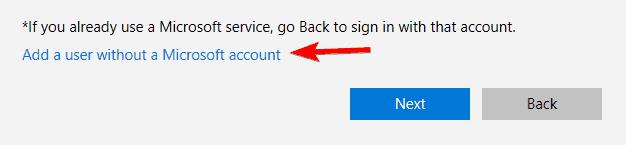
- Enter the desired user name and click on Next.

After doing that, switch to the newly created account and check if the issue is still present. If not, it means that your old account is corrupted, so you’ll have to move your personal files to a new account and use it as your main one.
If you’re having trouble opening the Setting app, take a look at this article to solve the issue.
Solution 9 – Turn off PowerShell
PowerShell is a powerful command-line tool and a core component of Windows 10. However, few users reported that they can’t pin tiles to Start Menu due to PowerShell.
It’s quite unusual to see that PowerShell is interfering with Start Menu, but you can fix this problem simply by disabling PowerShell. To do that, just follow these steps:
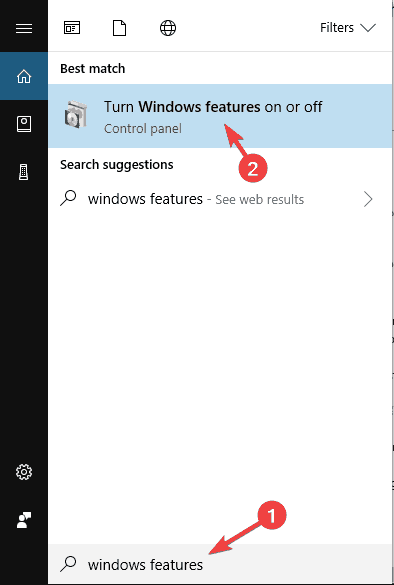
- Press Windows Key + S and enter windowsfeatures. Now select Turn Windows features on or off.
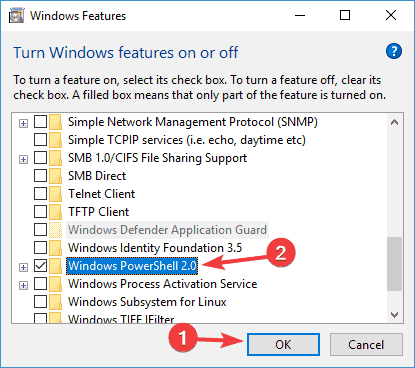
- Windows Features window will now appear. Uncheck Windows PowerShell 2.0 and click on OK to save changes.
- Restart your PC to apply changes.
Once your PC restarts, the issue with Start Menu should be resolved and you should be able to pin apps without any problems.
Solution 10 – Delete the TileDataLayer directory
According to users, sometimes TileDataLayer can cause this issue to appear. In order to fix the issue, it’s advised to delete this directory and check if that solves the problem. To do that, follow these steps:
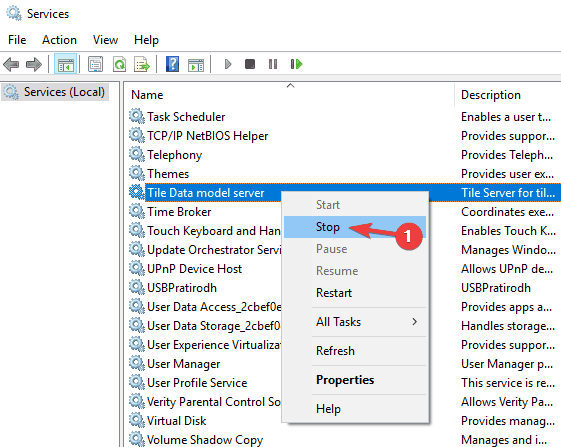
- Press Windows Key + R and enter services.msc. Press Enter or click OK.

- When the Services window opens, locate the Tile Data model server, right-click it and choose Stop.
- Now go to C:UsersYour_usernameAppDataLocal directory and locate TileDataLayer directory. Now create a copy of this directory and save it on your Desktop, just in case.
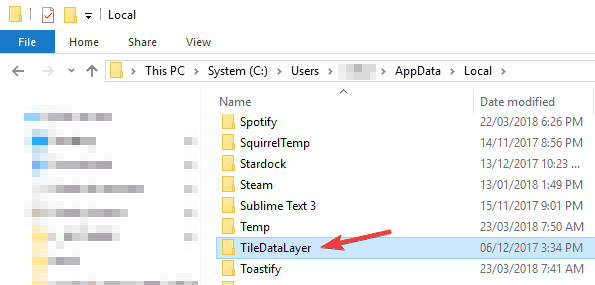
- Delete the TileDataLayer directory and restart your PC.
Once your PC restarts, check if the problem still appears. By deleting this directory you’ll force Windows to recreate your tiles, and the issue should be resolved.
Solution 11 – Copy the applications to the Programs directory
According to users, you might be able to circumvent this issue by copying your shortcuts to the Programs directory.
In case you’re not familiar, this directory holds all your Start Menu applications, and if you want to add items to Start Menu, you just need to move them to this directory. To do that, just follow these steps:
- Make sure that you’re logged in with the administrator account.
- Locate the shortcut that you want to add to Start Menu, right-click it and choose Copy.
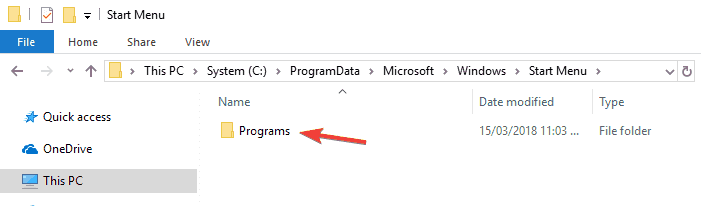
- Now go to C:ProgramDataMicrosoftWindowsStart MenuPrograms directory and paste your shortcut there.
- Now open your Start Menu and you should see the new shortcut in the Recently Added section. Simply right-click the shortcut and choose Pin to Start and that’s it.
Some users are also suggesting to copy the shortcut to C:UsersYour_usernameAppDataRoamingMicrosoftWindowsStart MenuPrograms directory, so you might want to try that as well.
Which workaround worked for you? Tell us in the comment section below. Also, leave there any other questions you may have.
RELATED STORIES YOU NEED TO CHECK OUT:
Editor’s Note: This post was originally published in July 2016 and has been since completely revamped and updated for freshness, accuracy, and comprehensiveness.
I can pin some programs to taskbar on Win7 using PowerShell.
How do I modify the above code to pin a program to the Start menu?
5 Answers 5
Use the code below
Note: the change is in the fourth line.
If you want to add an action like Pin to Modern UI interface (Windows 8), at $verbs, add 51201
The main problem with most of the solution is that they enumerate the verbs on a file, search for the string to perform the action (“Pin to Startmenu” etc.) and then execute it. This does not work if you need to support 30+ languages in your company, except you use external function to search for the localized command (see answer from shtako-verflow).
The answer from Steven Penny is the first that is language neutral and does not need any external code. It uses the verbs stored in the registry HKEY_CLASSES_ROOTCLSID <90AA3A4E-1CBA-4233-B8BB-535773D48449>and HKEY_CLASSES_ROOTCLSID
Based on this, here’s the code we are now using:
Steven Penny’s second answer above worked well for me. Here are a couple more tidbits.
It’s doing COM through PowerShell, so you can do the same thing with pretty much any COM client. For example, here’s an AutoHotkey version.
VBScript or InnoSetup would look almost the same except for the function used to create the object.
«>